What's
New - Timeline
- Articles
- Techniques
- Catalog
- Seminars
- Links
- Contact
Us
Alliance Martial
Arts
Circle of
Steel
Presents the
Solthurner
Fechtbuch
Rare Dagger Techniques from an
Anonymous Manual
Copyright 2001 Pete
Kautz
What is the Solthurner
Fechtbuch?
So-named for the Archive in
Solothurn, Switzerland where it was found, this book is
believed to be from the 15th century and its author is unknown. It's
techniques closely resemble the ones from some of Talhoffer's
Fechtbuchs. There are conflicting theories about its origins, with
guesses as to the date of publication from 1420-1490, but I believe
from the costuming of the people and the technical material it is
probably from the 1480's and is in fact a semi-rip-off of
Talhoffer.
Though the exact origin of the
book is uncertain, it is physically smaller than any of Talhoffer's
works and contains much less material on each topic. There are
techniques shown with long swords, dueling shields, dueling shield
and short sword, wrestling, fighting on horseback, fighting in armor,
and the duel between husband and wife; though most of these areas
only contain a few techniques. The longest sections are devoted
to the long sword, dueling shield, dagger, and wrestling (though only
the long sword depicts more than a dozen movements.)
What Dagger Techniques does
it Contain?
The Solthurner fechtbuch
contains only 9 plates showing the knife being used. Of these,
7 times it is pictured in the forward grip, and 9 times it is
pictured in the reverse grip. This is a higher proportion of
forward grip to reverse grip techniques than most of the other
Medieval manuals, which greatly favor the reverse grip. This
may be by design, or simply because of the brevity of the
instruction. In the Solthurner techniques, the forward grip is
generally used for long range cutting or thrusting against the enemy,
while the reverse grip is used for hooking, trapping, and
stabbing.
Over the next few months we
will be presenting all these as photo techniques, as well as giving
you some other ideas on how to train these concepts.
Dagger in Unarmored
Combat
There are 7 techniques shown in
the Solthurner fechtbuch for unarmored combat. The first 3
emphasize the long range dueling aspect of dagger work. The
first two techniques emphasize the long range cut to the opponent's
hand as a defense against an attack, first against the forward and
then against the reverse grip stab. The third defense uses the
alive hand to parry the attack and then you return a stab.
The fourth technique is an
entry into grappling following the open hand parry and an arm
hook/cut with the dagger. From here we get closer, and the
final three movements of the unarmored section are for
grappling. The fifth technique shows the classic “Scissors
hold” using the dagger, and numbers 6 and 7 are both
counters to this. Next month we will feature photos of
techniques 4-7, but for now, enjoy!
Solthurner Fechtbuch Dagger
Techniques 1-3
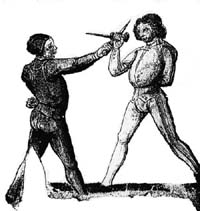
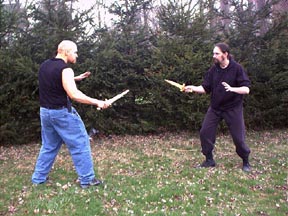
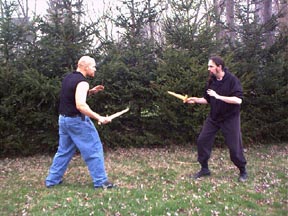
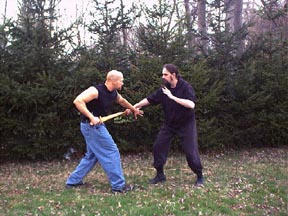
Dagger Technique 1:
Cut the Hand
This technique
exemplifies the long range play, as you stay out of range,
and the moment you can first cut his hand you do so right
away. Practice defending through different angles
using slashes and hacks to the fingers, hand, wrist, and
forearm. Cutting the weapon hand or arm is one of the
oldest military methods of blade combat that there is,
taught to the Roman Legions of the ancient world and
probably even earlier. Imagine the defender striking,
and possibly cutting off, the attackers thumb. Try and
hold onto that dagger now, Sparky!
|
|
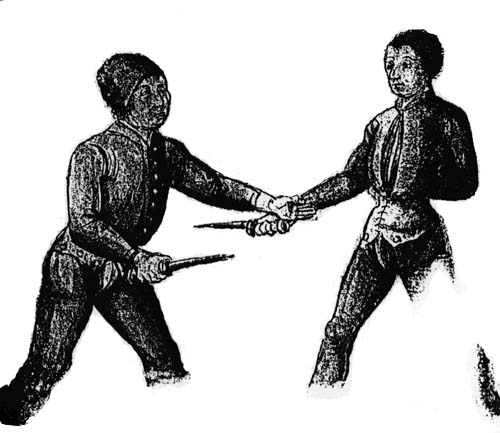
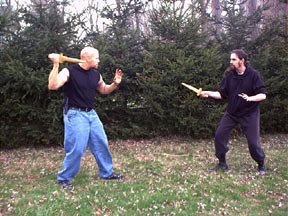
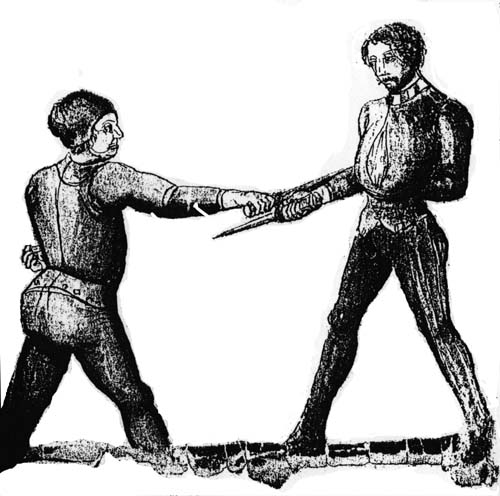
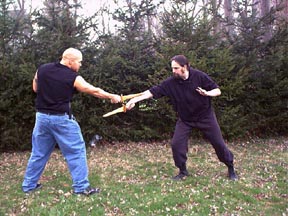
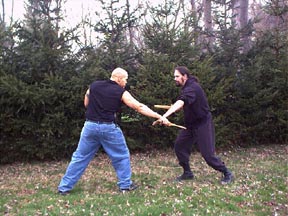
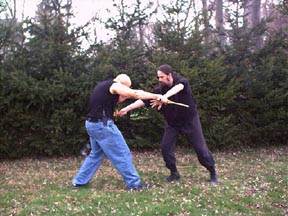
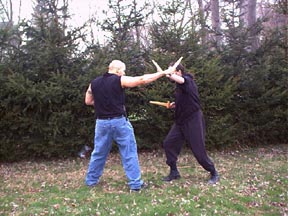
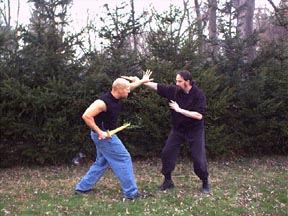
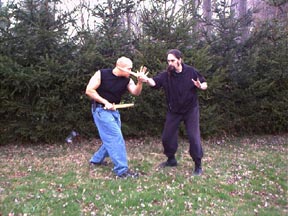
Unarmored Technique 3:
Hack and Stab
The opponent stabs at your
body. Using your left hand you parry / hack it aside
with a low outward and downward blow and immediately counter
with your own stab. This is a quick stab and counter,
and makes an excellent back and forth style flow
drill. Once you and your partner can both do it, then
try to do it in 3 or 5 step exchanges. When this is
easy, experiment with changing angles on the return stab and
how that then changes the follow ups and forces different
types of footwork and evasion.
Though in still pictures it looks like a
1-2 motion, in fighting the closer you can deliver the stab
after the parry the better. Timing and rhythm can not
really be shown in these kinds of pictures. If you are
too slow and make it a "1 and 2" kind of exchange you are
giving the opponent a window of opportunity to interrupt
your pattern and counter you of the half-beat. (If you
think of the parry as "1" and the stab as "2" the opponent
counters you on the "and" between 1 "and" 2.
|
|
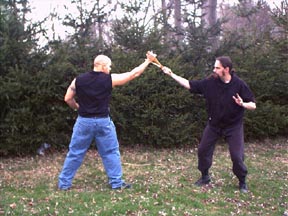
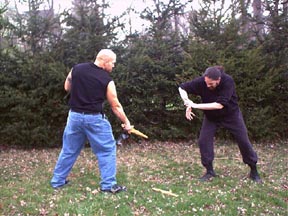
Extension Drill from Technique
3
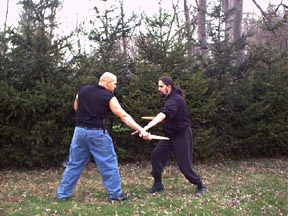
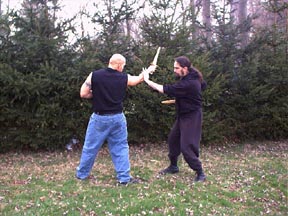
In the extension we just start
to work stabbing from different angles, evading and parrying with the
empty hand and stabbing back quickly. Thrust along all 8 angles
of the segno and try to maneuver around your training
partner, so you can stab him where he can not parry...force him to
move or get hit. Every so often let yourself get hit
also...then you know that your partner is not just playing a pretty
game with you and is trying to hit you.
This is NOT about trying to
hurt your partner! If we see you try to hurt someone in our
classes you will get your kicked out on your ass...there is no place
for that kind of behavior. However, you must be willing to HIT
your partner to help them learn. If you are not aiming to hit
when doing drills in your school you are RIPPING OFF your training
partner. It is your duty to hit him (or her) and it is their
duty to block or not be there. If no one has really tried to
hit you, how can you be sure your defense really works? You can
go on for years being "helped along" by a nice friendly
uke in the martial arts and have fun, but for real, you
have nothing for the time spent...or worse, only an ability to give
hurt and no ability to defend...you can "dish it out but you can't
take it"!
These kinds of things are what
make the difference. You must learn to "Invest in Loss" as the
Tai Chi Chuan (Grand Ultimate Fist) people would say. You lose
to learn. Your conditions of winning change. You "lose to
win". You try, and if you get hit it is learning not
failure. Pain is feedback of bad performance...the trick is to
learn to appreciate the feedback and be sensitive to change what you
are doing. Greater awareness leads to deeper learning.
The speed and power of the opponent can literally make you move
faster than you could if you thought about it. You move faster
simply because you must! This sounds crazy, but
the experienced know it is true!
When training these techniques,
a safe training weapon and facial protection quickly become a
necessity. A padded dagger and a fencing mask or hockey helmet
will suffice, with some kind of gloves (hockey, street hockey,
lacrosse), forearm pads, elbow pads, etc. at your option. I
prefer to use less armor and a safer weapon, so will use daggers made
of folded cardboard for some of the full speed drills. These
still hurt quite a bit (and could break a rib on a thrust) and can
last for many months if made correctly, yet will *usually* break
before your opponent's body does on a dangerous thrust (certainly far
safer than a pvc core or wood in a similar circumstance!) When
making these, fold (don't roll) them out of cardboard and fold With
the corrugation. A piece about 15x24 will fold into a nice 15"
dagger. Make the fold neat and tight every time and tape
securely.
One other thing we have found
is that if you are breaking a lot of these, it is likely because you
are hitting with the flat of the dagger and that is causing it to
bend (as it would when it fails). If this is the case, go back
and work your basic cutting angles of attack, focusing on cleanly
cutting with the edge for each one.
READ PART
II
Dagger Techniques
4-7!
RESPECT IS THE BEST ARMOR - TRAIN HARD - TRAIN
SMART
What's
New - Timeline
- Articles
- Techniques
- Catalog
- Seminars
- Links
- Contact
Us